Quick Start Guide


This kit detects airborne mold spores using spore traps. The lab results and report are for informational purposes only.

The GOT MOLD? Test Kit is not to be used as a substitute for professional testing performed by a qualified inspector.

If you are experiencing health concerns which you think may be mold-related, please seek medical advice.

Time: 2-3 days
- Keep exterior doors and windows closed as much as possible for at least 2-3 days before and during sample collection.
- Turn off all standalone air filters and air purifiers for 2-3 days.
- Do NOT turn off heating and/or air conditioning systems.
- Do NOT mow grass, rake leaves, or otherwise disturb the property on the day of sampling.
- Choose a day when it’s not raining or snowing for the best results.
- If you’ve done all this… THEN YOU’RE GOOD TO GO!

All samples must be collected at the same property, the same day, within one hour. Failure to follow these instructions will invalidate your results.
Time: As needed
- Focus on rooms where people frequently experience symptoms, where a musty/damp odor is present, there has been a history of water damage, or where you may have noticed excess moisture or possible mold growth.
- Record your selections on Page 4 of the printed Quick Start Guide that accompanied your test kit. You will need this information during kit activation and sample submission in the next step.

For details on how to perform a thorough inspection, download our comprehensive guide, How to Find Mold in Your Home, available at: gotmold.com/findmold
Time: 10 minutes
- Activate your kit online at: gotmold.com/activate.
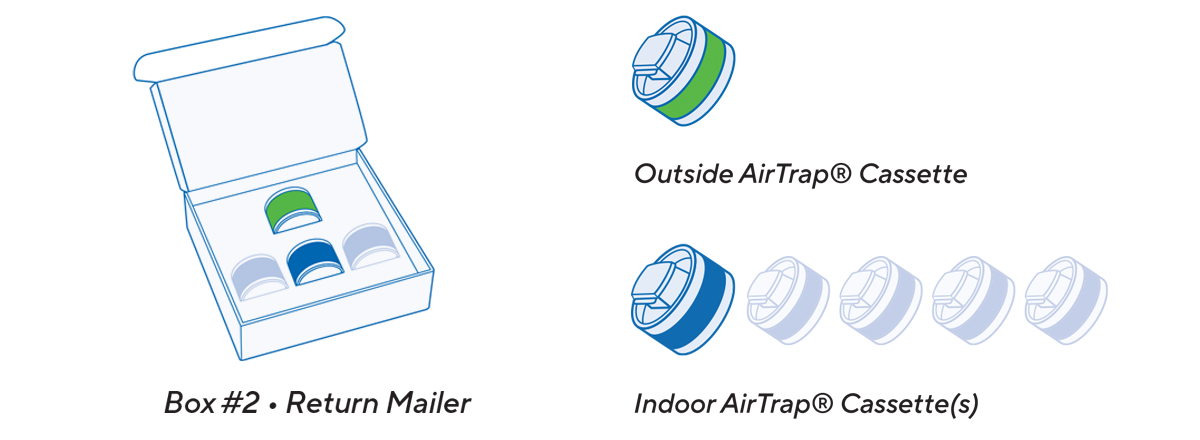
- Enter the unique KIT ID# found on the top of the outer box. This ID# can also be found on the inside of Box #2 and on all of the sampling cassettes.
- Enter Your Sampling Details: Includes who collected the samples, where they were collected, and where to send the report.
- Review & Confirm: Once you’ve submitted your details and received confirmation, please proceed to the collection of your samples.
You must activate your kit and register your sampling details before sending your samples to the lab. Failure to do so will prevent your samples from being processed.
Time: 2 minutes
- Open Box #1 and remove the BioVac air sampling pump.
- Put four new, brand-name AA alkaline batteries into the pump.*
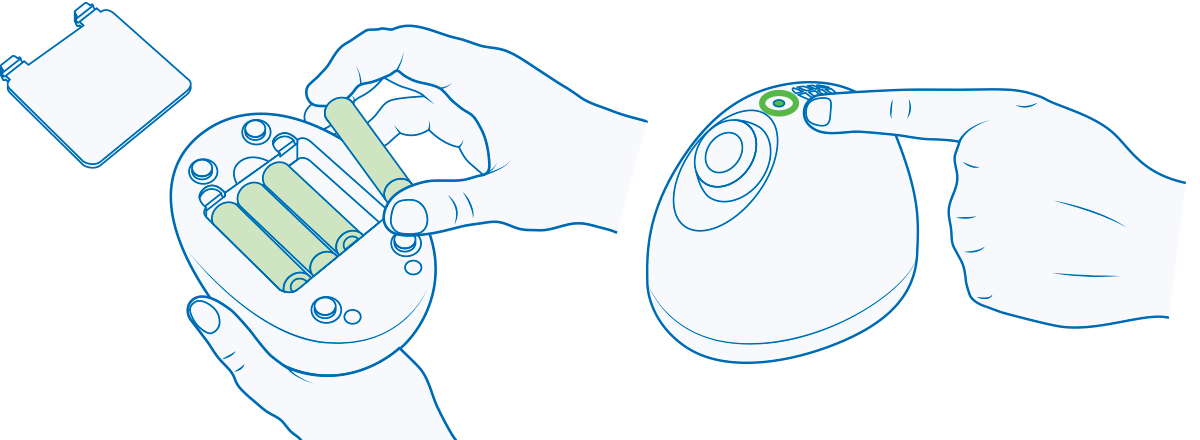
NOTE: The green light on top of the unit means the batteries are in correctly. If no light appears, please check the orientation and try again.
* If someone passed a BioVac along to you and it still has batteries in it, replace them with new, brand-name batteries for optimal results.
Time: 7 minutes
- Remove and open Box #2, which contains the AirTrap cassettes. Box #2 is also a prepaid return mailer. You will use it to send the samples to the lab for analysis.
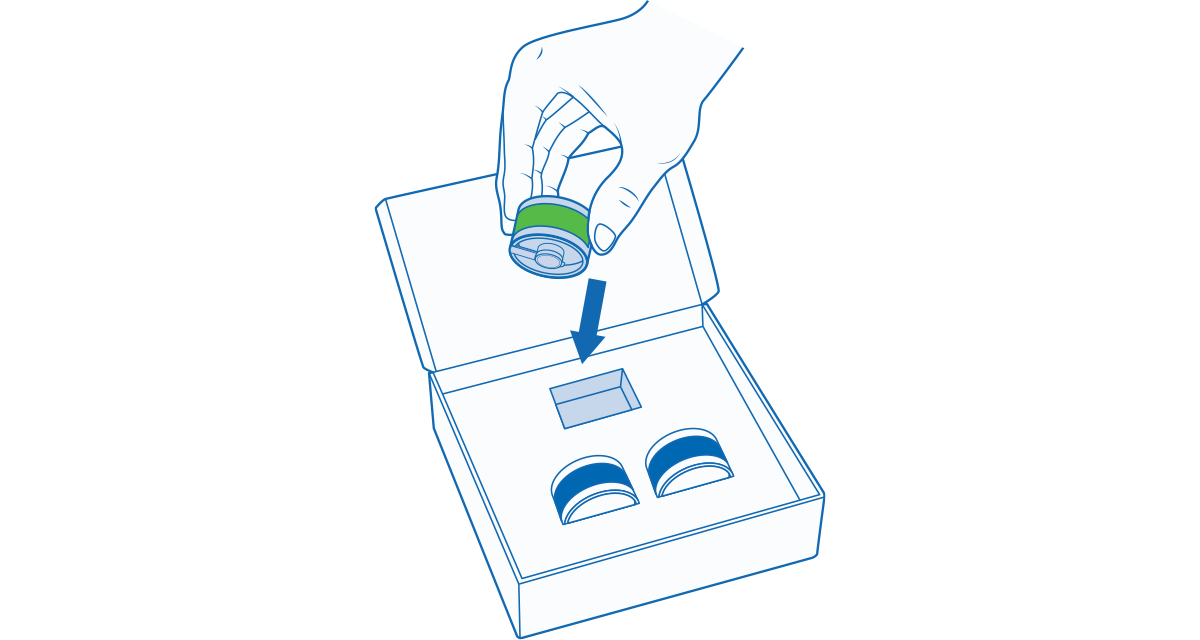
- Remove the (green) outdoor AirTrap cassette from the box.
- Open the caps fully on both ends.
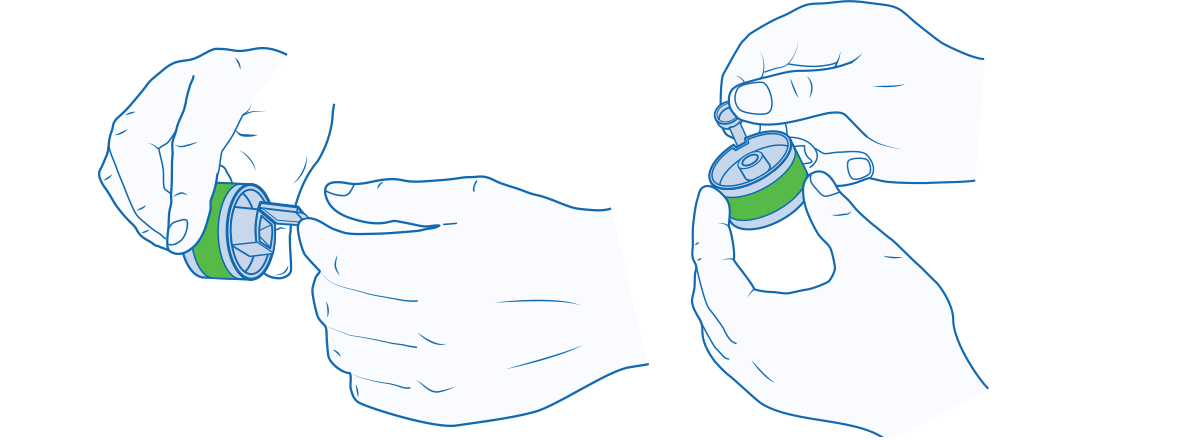
- Place the cassette snugly onto the BioVac air sampling pump.

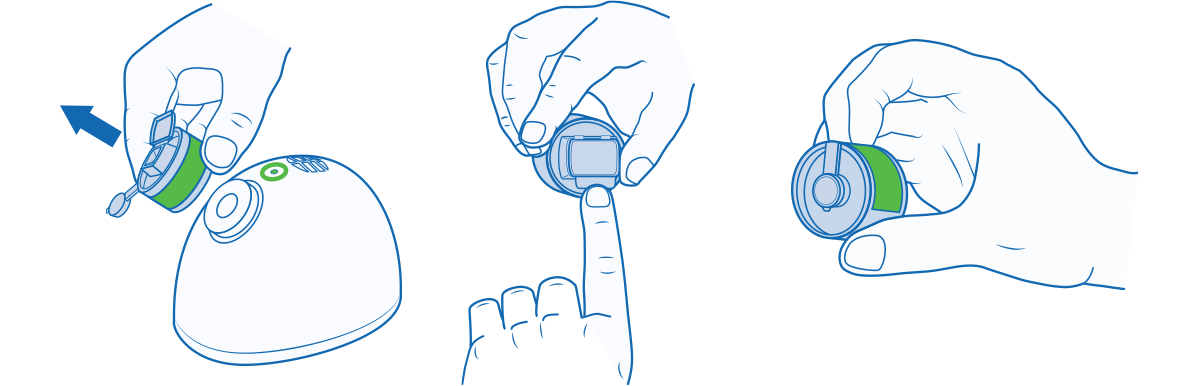
- Then place the pump outside on a clean surface, 5-10 feet from the most-used entrance, at least 30” above ground.
- Press the gray button located on the top to start the BioVac. The light will turn RED for 5 minutes during sampling, and will automatically change back to GREEN when finished.
- Remove the cassette, firmly close both end caps, and return it to Box #2.
* The outside sample is required for analysis and creation of your report.
Time: 5 minutes each
- Go to the location(s) you recorded on your Sampling Worksheet.
- Just as you did for the outdoor sample, open the caps fully on both ends of the first unused (blue) indoor cassette.
- Place the fresh cassette on the pump. Put it on a clean surface, at least 30” from the floor, near the center of the area or room. Then press the gray button to start.
- When complete, remove the cassette, firmly close both end caps, and return it to Box #2.
- Repeat with the other unused cassettes included in your kit.

PRO TIP! Spores naturally settle out of the air, so it can be helpful to slightly agitate the environment with fans (ceiling, HVAC, standalone, etc.), and human movement in the areas you are testing.
Time: 2 minutes
- Be sure ALL the cassettes are back in Box #2, which is the return mailer. They should be in the same slot from which they were originally removed.
Time: 2 minutes each
- Peel the protective cover from the adhesive strip on the inner lid and seal the box.
- Drop the sealed box in the mail. No postage is necessary if mailed from within the United States. Shipping time may vary. You will be notified as soon as the lab receives your samples.
Did you activate the kit and register your sampling details? It is required for processing.
Time: Transit time plus 3 business days
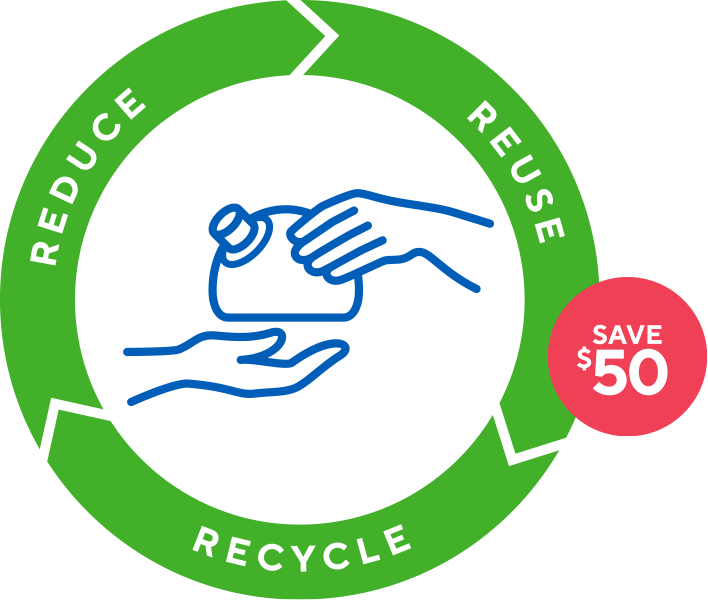
Don’t Throw Away Your Pump!
- Your GOT MOLD? BioVac air sampler is reusable.
- Save it to test again, or share it with someone who also cares about their air.
- All that’s needed are refills, which start at just $149 for one room and can be ordered at gotmold.com/refills
- Standard kits come with fresh batteries. After samples have been collected, please remove the batteries and feel free to reuse them for any purpose.
Resources & Support
- For additional information, visit our Learning Center at: gotmold.com/learning-center
- Download our comprehensive guide, How to Find Mold in Your Home: gotmold.com/htfm
- Where is my report? Go to: gotmold.com/status
- Need to do more testing? Order refills at: gotmold.com/refills
- Need help? Go to: gotmold.com/help Or email: help@gotmold.com
- Got feedback? We’ve worked hard to make this as easy as possible. Please let us know what you think at: feedback@gotmold.com
Disclaimer
The GOT MOLD? Test Kit is not a substitute for a mold inspection performed by a qualified professional. Its purpose is to be a cost-effective first step. Please do not make any major life decisions, such as planning remediation, filing lawsuits, relocating, etc., based solely upon the results from this, or any, do-it-yourself test kit.
If there are “alert conditions” detected using this kit, it’s highly recommended that you seek out a qualified mold assessment professional to perform a thorough physical inspection, perhaps additional testing, and provide a full, written report with observations, recommendations, and a remediation plan, if needed.
This test kit uses professional air sampling cassettes known as spore traps, which collect microscopic particles floating in the air in the immediate area being sampled, at the time of sampling. These conditions are constantly changing and depend on many factors, such as ventilation and movement in the building. Given these variabilities, and that human sensitivities to mold range widely, the results from this kit are not to be considered a measure of exposure or risk, nor be used solely to determine if the building is “safe” or not.
Spore traps capture spores floating around in the air. If there is a hidden mold problem—in a wall, for instance—this method may not detect it. Similarly, if the air in the room has been still for an extended time, spores may have settled out of the air, and the samples can look cleaner than expected.
In all cases, if you are experiencing health issues that you think may be building-related, please seek medical advice.