Posted on 1 Comment

Mold Facts & Myths

child doctors checkup for Health

MYTH No. 1  

‘Toxic’ Mold is the only dangerous type of mold.

“Toxic” mold or “black” mold is often touted by the hucksters in the mold industry as being the one that makes people sick, the one you must eliminate. This is a pure scare tactic.

Yes, there are some strains of mold that seem to be more toxic than others. But there is no such thing as good mold, or even tolerable mold, unless you like stinky cheese. Mold in your home is a problem because it signifies a moisture problem. Moisture inside your home enables mold growth, and it can also lead to rot, threatening the structure itself.

On top of that, any mold problem that’s allowed to continue often will pave the way for the dreaded “black mold.” The most infamous “black mold,” stachybotrys chartarum, is what’s known as a tertiary mold. It’s very slow to develop and usually follows earlier mold growths, actually feeding off the previous mold colony.

Stachybotrys is also the most difficult to detect in air samples because its spores are heavy and reluctant to become airborne. And the cheap Petri dish, or settling plate, test kits you can buy in the big-box stores, which often brag about detecting “black mold,” actually won’t grow stachybotrys at all, because the culture medium is wrong.

There are more than 100,000 species of mold (experts are still debating how many), and many have been found to be hazardous to human health. While it may be true that some molds are intrinsically more hazardous than others, it’s our belief that there is no such thing as benign indoor mold growth. That is, any unnatural concentration of indoor mold—no matter the type—is a problem and should be confronted.

Bottom line: Indoor mold is bad for your house and bad for you and your family.

MYTH No. 2

It has not been proven that mold is a health risk.

The negative health impact of mold exposure is well documented. If any health practitioner scoffs at the idea that mold exposure can make people sick, this is not a professional you want to place your trust in. He hasn’t done his homework.

“Health effects (of mold exposure) generally fall into four categories. These four categories are allergy, infection, irritation (mucous membrane and sensory), and toxicity,” says Dr. Harriet Ammann of the Washington State Department of Health’s Ecology Department.

Dr. Ammann’s highly detailed and footnoted paper will glaze most readers’ eyes, but an excellent example of mold toxicity may reside in an affliction most of us are familiar with: the peanut allergy. Some experts argue that people who are allergic to peanuts are not actually allergic to peanuts, but rather to a toxic substance produced by a mold that grows on peanuts called aflatoxin b.

Whether or not aflatoxin b. causes life-threatening allergic reactions, it is nonetheless considered one of the most potent carcinogens known to science—serving as a direct cause of cancer—and is produced by a fairly common mold. A number of institutions have documented the negative health effects of mold, including the Mayo Clinic, the US EPA, Berkeley Labs, Brown University, and the University of Tulsa.

Bottom line: If you are exposed to indoor mold, get rid of it, or get out.

MYTH No. 3

If you can’t see it or smell it mold is not a problem.

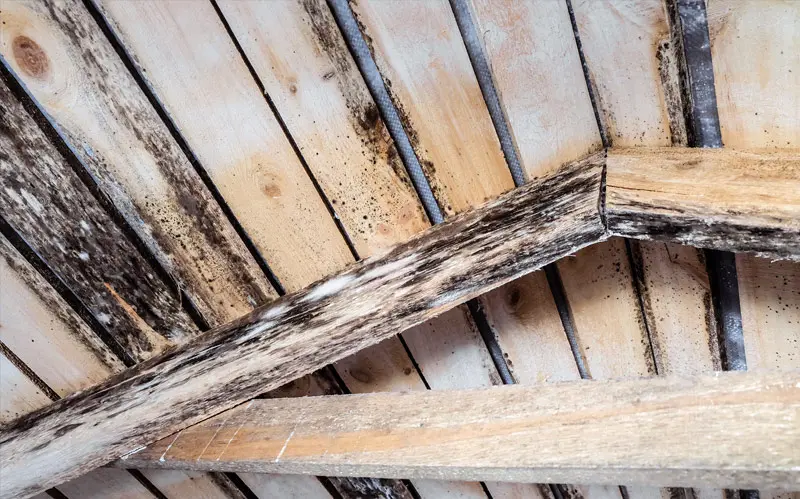
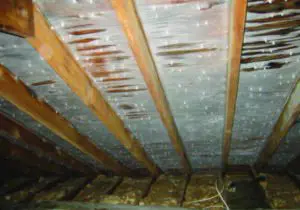
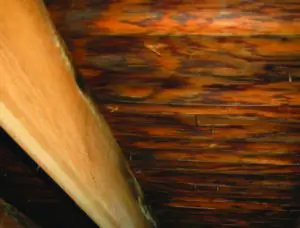
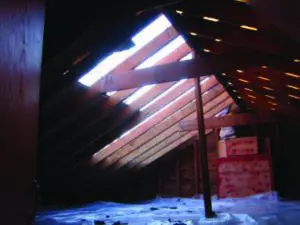
Mold can grow very well in complete isolation, inside wall cavities, between floors and ceilings, in attics. Not only can you not see hidden mold, but if it’s cut off from the flow of air that you’re breathing, you’re unlikely to even smell it.

But mold has a nasty habit of producing chemicals that can penetrate walls and get into your lungs anyway. These chemicals are of two types: microbial volatile organic compounds (MVOCs), and mycotoxins (poisons produced by fungi). These chemicals can make some people very sick, and they rarely know what hit them.

And then there’s the unavoidable fact that indoor mold growth is a symptom of excess moisture, and excess moisture will eventually wreck your home.

Bottom line: If someone is chronically ill in your house, and especially if they feel better when they’re away than when they’re home, a professional mold inspection is needed.

MYTH No. 4

Bleach kills mold.

Liquid bleach is a solution of chlorine in water, usually 6 percent sodium hypochlorite, thus 94 percent water. Smearing bleach on mold may appear to kill it, but the effect is superficial and very temporary. Once the chlorine is gone – and it evaporates rapidly – what’s left is all that water, feeding the mold.

There are many chemicals that kill mold. They’re called biocides. That means they kill life. (Bio = life + cide = kill.) Also: Anything that will kill mold is also a potential health threat to you and your pets. Even if you close up a house and gas it or fog it with one biocide or another, what you’re left with is a house full of dead mold, which can be every bit as dangerous to health as it was alive.

Moldy materials in a home must be carefully removed by properly trained professionals – after the moisture problem is identified and solved – and replaced with new, clean, dry material, or the problem will persist.

Mold removal, known as remediation, is done much like asbestos removal. Workers in “moon suits” and respirators isolate the work area with plastic sheeting. They set up HEPA-filtered fans blowing outdoors to create negative air pressure in the work zone, and begin removing moldy drywall, carpet, carpet padding, and whatever else cannot be cleaned. All that material is then bagged, and the bags and wiped down and carried outside to avoid contaminating the rest of the house.

Bottom line: A little mildew on your shower tile can be cleaned up with bleach. Anything else likely requires professional help.

FACT No. 1

Mold is everywhere and mold problems exist indoors in every climate.

Mold is, literally, everywhere on the planet, in every climate. A house in the Mojave Desert can have a mold problem as easily as one in Florida or New Orleans.

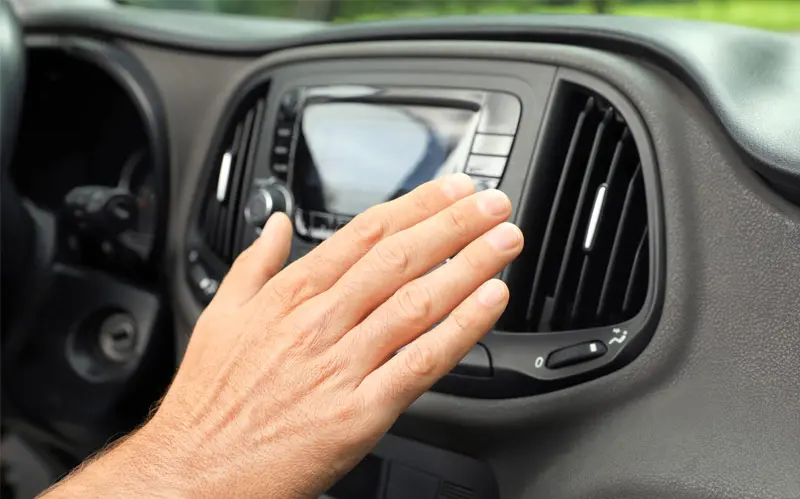
Mold needs three things to thrive: moisture, food, and the right temperature. Moisture can collect in walls, attics and crawl spaces in the driest of climates with a little help, such as a roof or siding leak, plumbing flaw, and pressure differentials created by air conditioning, or even a poorly vented bathroom.

Food for mold is pretty much everything we build with and everything we own. Mold loves household dust… even in the kitchen sink. And the warmth mold needs is the same temperature range humans prefer.

Bottom line: Every home has mold but not every home has a mold problem. If you think you might have a mold problem, don’t ignore it. Get help.

FACT No. 2

Mold affects everyone differently.

Some people can live in a house teeming with mold growth and never be bothered by it. Others need only open a musty book to begin a fit of sneezing, watering eyes, headache, dizziness, you name it.

One person in a mold-infested home may develop serious, debilitating respiratory problems, while another person in the same home may just have an occasional headache, or a little brain fog, or nothing at all.

Frequently, the person most affected by indoor mold exposure has an immune system already compromised by other factors: they’re infants, or elderly, they’re on immune-suppressant drugs, they’ve been treated often with antibiotics, they’re on chemotherapy for cancer, and so on.

But not always. Some people are the proverbial canary in the coal mine. They are sensitive to mold and its byproducts.

Bottom line: If someone in your home is chronically ill, always consider the possibility that something in the environment, such as mold, is the trigger.

FACT No. 3

A clean house (and/or new house) doesn’t prevent mold from growing.

Despite what you might think, new homes are more likely to have serious mold problems than old homes. Surprised? Modern construction materials, such as drywall, absorb more moisture than older products such as plaster. The way buildings are built today, they also dry more slowly when water gets into places where it shouldn’t be. In addition, many of the things we now use to build houses contain nutrients ideal for mold growth.

Making matters worse, most houses have very little fresh air exchange, so when mold and the other byproducts of dampness begin to proliferate, it becomes concentrated, causing potentially serious health problems including asthma attacks, sinus problems, allergies, fatigue and numerous other ailments.

Mold is not about dirt or sloppy housekeeping. Mold is about excess moisture, somewhere. Too much humidity in the air – anything over 50% relative humidity – can encourage mold to develop in dark corners, behind furniture, in closets, walls and other places.

Structural flaws that allow even tiny amounts of moisture to develop inside of a house – insulation errors, unseen plumbing leaks, any number of water-related situations – can give mold the foothold it needs. No amount of cleaning will eliminate it.

Bottom line: If you think you may have a mold problem, don’t be embarrassed, and don’t deny it out of pride. You owe it to yourself and your family to nip it in the bud.

FACT No. 4

Home inspectors don’t know mold.

Unfortunately, many home inspectors (the people who check out a house prior to sale) are ignorant to the presence of harmful mold. Some will see mold, but ignore it because there’s no rot or obvious moisture. Others may not see it at all.

An experienced and responsible home inspector, however, will recognize mold on sight and immediately alert the homeowner or prospective buyer. The best inspectors may go even further by providing a referral to a reputable mold assessment company.

A not-so-experienced and responsible inspector might tell you to “clean” it up, treat it with bleach, buy a fogger, etc. Don’t do that.

Bottom line: Don’t expect a general home inspector to know how to deal with mold—even if he can find it and even if he’s recently painted “Mold” on the side of his truck. Seek an expert.

Posted on 1 Comment

How to Find Mold in Your Home

How to Find Mold in Your Home ebook

Download “How to Find Mold in Your Home”

Professional Tips and Techniques

Yes, you can inspect your home “like a pro,” if you have the basic information and know the visual clues most professionals use. The primary advantage most professional inspectors have over you is experience, much of which can be replaced by knowledge. We offer you this knowledge, right here, right now, at no charge.

The purpose of this eBook is to educate you about indoor mold and the process of mold assessment. Our hope is to ensure that you have the right information to take whatever steps are needed next or to rest assured that no current problems exist.

There are three kinds of mold:
1. Mold you can see
2. Mold you can smell but can’t see
3. Mold you can’t see or smell

The third type, hidden mold, can be the most damaging because it’s allowed to thrive unchecked. Most people who see or smell mold take action, but it’s the unseen mold that is the greatest hazard to health and wealth.

It’s extremely important to know that where you find visible mold, there is a high probability of hidden mold, often in much greater quantity than the visible part.

A careful, educated inspection of your home, in pursuit of moisture problems, past or present, is the smartest thing you can do, because indoor mold growth is a symptom of a moisture problem and excess moisture is the enemy.

The next smart step is testing. In the event you discover a mold or moisture problem, the next step is to determine whether it has caused an air quality problem. The most affordable, easiest, and most scientific way to do that is to purchase the GOT MOLD?® Test Kit.

If your inspection finds nothing, but you still suspect a mold problem, air sampling often can confirm your suspicions and help you get control of your problem.

By reading and following the instructions in this booklet, you will gain a solid understanding of your indoor environment and where to test for mold. We will guide you through an inspection of your outdoor and indoor spaces, and explain why some conditions may indicate the presence of mold.

Our motives are simple: We want you to become a more educated consumer and understand why utilizing the GOT MOLD? Test Kit should be your first course of action when a problem is found.

Download “How to Find Mold in Your Home”

Posted on 1 Comment

The Problem with “Free” Mold Inspections

couple researching Free Mold Inspection

You’ve surely heard the phrase “There’s no such thing as a free lunch.” But have you ever wondered where it came from?

The “free lunch” refers to the long-gone tradition of pubs and taverns providing a complimentary midday meal to their patrons. Of course, the offerings always consisted of food so salty that anyone who ate the “free lunch” likely ended up drinking plenty of not-free grog to wash it down. The food may have been free, in theory, but there was plenty of cost behind it.

The same applies to so-called “free” mold inspections.

The problem is this: Companies that come and do free inspections aren’t actually mold inspectors. They are mold remediators. The people who offer free services are doing so with the hope of getting paid some other way, and, in many cases, they are providing services they are woefully unqualified to provide.

An inspection, done properly, takes several hours on-site and usually costs +/- $1500, including testing, which involves the analysis of samples by an independent, third-party laboratory. The lab certainly doesn’t work for free, nor does an inspector. So somebody’s got to pay. That somebody is the customer.

A proper inspection generally represents a total investment of nine to ten hours, the byproduct of which should be a comprehensive written report documenting findings plus a detailed remediation and repair plan. This includes hours of consultation in-person, on the phone and/or by email. Trust me: a free mold inspection like this doesn’t exist.

Instead, during a “free” inspection, someone from a mold remediation company — not a mold inspection company, crucially — will come to your home and seek out a mold problem, whether you have one or not. Make no mistake, they are working their tails off to find anything that they can then use to sell you on mold remediation services. At which point you may be thinking, “Wait a second. This sounds more like a sales call…” and you would be right.

For a mold remediation company, the “free inspection” is really just a way to get their foot in the door. Your door (and your wallet).

Sometimes they even claim to provide “one-stop-shopping”—offering to do the testing before and after the remediation. This means they would be checking their own work, which is not a check at all, but rather a blatant conflict of interest. So blatant, in fact, that it’s illegal in several states, and there are many states where similar legalization has been proposed.

This kind of double-dipping has been illegal in the asbestos industry for ages, and it stands to reason that it should be illegal in all 50 states when it comes to mold, too. Eventually, it will be. In the meantime, you, the consumer, need to be aware of the landscape and protect your own interests, because there are more companies out there doing it the wrong way than the right way.

So, what does a proper mold inspection entail?

First of all, it’s usually at least a 2-3 hour commitment on-site, beginning with learning about the background of the building and the concerns of the occupants, followed by a comprehensive physical inspection of all accessible areas of the building, inside and out. Various screening methods are employed to “peel the layers of the onion” away.

Infrared cameras, laser particle counters, electronic moisture detection equipment, and many other tools, may all be utilized by an experienced, well-trained specialist. Following the first phase of the inspection, a testing strategy should be developed and then approved by you, the homeowner. Samples should be collected in accordance with industry standards and sent to an accredited third-party lab for analysis.

When the results come back, a document should be generated containing all of the observations made, including building defects, deficiencies, repairs needed, and a comprehensive remediation plan, along with the laboratory report and a written summary of the analysis, preferably in language that anyone can understand. It’s a step-by-step game plan designed to be the blueprint for restoring the property to a “normal,” healthy condition. This is how it should be.

And it doesn’t end there. An environmental consultant would then help you select the contractors, returning to do follow-up inspection(s) and testing to make sure the work has been completed satisfactorily. If more work is still required, the contractor must then come back and do what’s necessary to complete the project — at no additional charge — as many times as needed. Then, and only then, they should be paid. You’ll breathe easy knowing that you’ve actually gotten what you paid for.

Try getting all of that for free, no strings attached. Now try asking the pub to hold the salt on your free lunch. Not gonna happen.

Video: Click on the video links below to watch a very enlightening ABC News piece that looks at various mold companies and some of their unsavory tactics.

ABC News: One house. Seven mold inspectors with radically different approaches. Who do you trust?


Posted on Leave a comment

Who Doesn’t Love That New Car Smell?

new car air vents

Who doesn’t love the way a new car smell? It’s thrilling. A confirmation of accomplishment.

The new house smell is no different. Whether it’s a freshly completed renovation or the special feeling of being the first owner of a newly built home, we associate powerful, positive, invigorating feelings with those aromas.

But should we?

The truth is, this alluring potpourri is actually quite toxic. What you’re smelling are noxious chemicals being released from the plastics, paints, adhesives and finishes, known as volatile organic compounds, or VOCs. Even though they usually dissipate over time, they’re linked to a whole array of illnesses, and while this probably isn’t completely news to you, what I’m saying is that ignoring it may not be such a good idea. A hot new car is very attractive. A third eye, not so much.

You may have read about the Tesla owner who fell asleep while driving, sober, around noon, resulting in him killing a cyclist, and potential jail time. He’s blaming a high concentration of new car fumes for the overwhelming sleepiness he experienced, and he might be right. One of the most common symptoms of VOC exposure is fatigue, in addition to adversely affecting cognitive functions. Probably not an ideal environment for the interior of an automobile. Someone might want to do something about this. Perhaps if Congress spent less time on inane issues like steroids in major league baseball, they’d be able to work on stuff that matters, like this. Apparently, it’s a common issue at all levels in the industry. According to official documents from Bentley Motors, an “obnoxious odor” was a problem in cars made from 1999 to 2002 and was traced to a rust inhibitor. Like many things in life, it’s a tradeoff, especially with cars. You want new wheels, but unless you have Mark Cuban’s budget, you aren’t in a position to choose the materials your ride is comprised of.

Your house is a very different story.

They say we spend about 90% of our time indoors. This includes cars and public transportation.

Although it sounds like an awful lot, the good news is that we have the most control of our destiny in our homes. You just need to do your homework and be an informed consumer. These days, even the worst offenders in the building materials business are making stuff that’s far less toxic. It’s pretty awesome. In fact, it’s no different than the household cleaning products business. Before they used nasty chemicals and snappy marketing to sell low-quality stuff to the American public, as if it were somehow better than what our grandmothers used in the days before Windex existed. Fast and cheap was their mantra. That’s the former paradigm. Thankfully things have changed. It used to be a take-it-or-leave-it type of thing, but the consumer has spoken, and their voice was heard. We now have a plethora of healthy options.

I often say that clean doesn’t have a smell. Some of the odors that we encounter every day make us feel clean. Bleach has it’s place, but it’s in the washing machine. Sanitizers are for the hospital, not the home. Contrary to what most people think, there’s no need to use chemicals during mold remediation. They cause more harm than good. Do the research. Oh, and about air fresheners? I’ll save the keystrokes and electrons. Just throw them away.

It’s also the same with food and personal care products. Coca-Cola and Mcdonald’s are struggling while Whole Foods is booming and Acme and Shop-Rite are so busy shutting down stores they can’t be bothered to get the flies off their piles of rotting veggies.

Now, back to the point of this piece.

The new house smell is a serious issue, so I’ll share some of my thoughts, but the truth is that it’s too much for a little blog post. I’ll have to break this down into a few chunks, or write a real article about it, but in the meantime, here are the basics. The key is prevention, which is really about awareness and avoidance. Mold and other allergens can be cleaned up, but these chemical bad guys are much tougher to deal with.  Believe it or not, I’d rather buy a moldy home than a chemical-laden one. The fact that homes still get built – legally – with materials of comprised of well-known carcinogens simply stuns me.

If we want to reform healthcare and have a healthy society, let’s start with common sense. Let’s not make carcinogenic houses, cars and workplaces. Don’t even get me started about schools. We raise and educate our next generation in moldy, stale buildings and feed them non-food, while teaching them how to barely pass tests, like automatons. Barf.

Again, this is fodder for a future post.

Back to VOCs…

I’ve seen VOC problems affect a home from something as simple as a shopping excursion at Pottery Barn or IKEA. This is easy to deal with. You remove the source.

Once they’re embedded in your home though, it’s a different story. It’s bad news when your whole house is painted with builder’s grade paint, or when your hardwood floors are finished with the stuff from the bottom builders’ supply store shelf. I’ve actually had contractors verbally agree to use the healthy stuff, but throw it away when we left, and then proceed to use what they usually use. This resulted in them sanding off the finish and re-doing it on their nickel, then paying for the house to be HEPA-vacuumed. Needless to say, nobody was pleased except the guy we paid to clean it up.

Even though I’ve only talked about man-made VOCs, mold makes VOCs too, but they are called mVOCs, with the “m” standing for microbial. Interestingly, many of the compounds active mold growth produces look a lot like industrial chemicals. This explains why the vast majority of our most mold-sensitive clients are also sensitive to chemicals and fragrances. This syndrome is called Multiple Chemical Sensitivity (MCS) in some circles, but a woman down in Texas named Dr. Claudia Miller has renamed it TILT, which stands for Toxicant-Induced Loss of Tolerance. She’s written quite a bit on the subject. If you’re interested, you can start here. It’s estimated that 3-5% of Americans suffer from MCS/TILT.

When we are faced with client that has a VOC problem in their home, the first thing we have to do is identify the source(s), which often includes mold. The primary motive behind this part of the process is to determine exactly what the remedy(s) will be.

With an indoor air quality problem, you only have three options.

1. Source control: Get rid of it, if you can. But if it’s the paint on your walls or the insulation inside them, then that’s much easier said than done. Source removal and control is always best, but in cases where this isn’t practical or possible, we go to…

2. Filtration: Using special filters, which contain activated carbon/charcoal, the airborne chemicals are trapped, and over time, you can reduce the chemical load on the house. These are expensive, since they require a significant amount of carbon to make a dent in a sick home, and the filters need to be replaced regularly to remain effective. ($$$$)

A much better option, for several reasons, is…

3. Dilution: Introducing fresh air from outside – to dilute the not-so-fresh indoor air – seems like a no-brainer, but it’s only practical when the weather’s nice. Just opening your windows on a nice spring day won’t cut it. Also, who wants to watch their hard-earned cash go out the window with the VOCs? Thankfully, there is a solution. There are devices known as heat recovery ventilators (HRVs) and energy recovery ventilators (ERVs), which allow fresh air in while sending the stale air out—all while keeping your utility bill in check. Ask your HVAC guy about them. They are mandatory in many commercial buildings, but not in residential, even though every home should have one.

The bottom line is, if you or someone you live with are having symptoms that you think may be related to something in your home, it’s important to take action.

Posted on 2 Comments

Mold Sickness & Lyme Disease

ticks can cause Mold Sickness & Lyme Disease

I sat down to write this post without knowing that a new Lyme Disease-causing bacteria was recently discovered by Mayo Clinic researchers. It just so happened to show up in my newsfeed as I began typing.

Apparently, some of the symptoms are different, but the good news is the treatment is the same. Of course, if you know anything about Lyme, you know that the treatment can be anything but straightforward, ranging from a round of antibiotics to myriad other methods, depending upon your genotype and other confounding variables, including possible mold exposure. The treatment process can be a matter of months to a matter of years. Some people recover quickly and move on. Others seem to suffer forever, with symptoms that mirror multiple sclerosis, and other nasty diseases you wouldn’t wish on your worst enemy.

In my time as a mold inspector, a direct connection between Lyme disease and mold-related illness was apparent time and time again. It’s hard enough to deal with one of these issues, let alone both at the same time and with each possibly amplifying the other. It’s a complicated subject, and though the science behind it seems to be emerging more quickly than ever, there remain naysayers in the medical community who don’t believe Lyme is complicated at all and dispute the validity of something known as Chronic Lyme Disease. Here’s an example of the rhetoric from that camp.

This is a very personal issue for me, and the main reason GOT MOLD? exists.  In the early 90’s, as a child, I was diagnosed with Lyme while living in a moldy home. I gained weight, developed terrible brain fog, candida, fatigue, and a whole host of other life-altering symptoms. It’s taken me 20 years to overcome many of them, while a few still linger. This was long before mold illness or Lyme disease were taken seriously. There were certainly no such things as mold inspectors and mold remediators. Lyme doctors were marginalized and attacked back then. My doctor, Dr. John Bleiweiss, an early Lyme disease pioneer, committed suicide after being sanctioned by the AMA, well aware of what the road ahead involved for him and his family. It was terrible.

Lyme is a tough disease. It’s tough to diagnose properly since it mimics other diseases. It’s tough to treat since the offending bacteria have developed some pretty effective defenses and know how to hide. The symptoms can be brutal, oftentimes creating a whole host of other sensitivities to things as basic as light and fragrances. And because it’s a biotoxin-based illness, it works against you in the case of mold exposure, where the two amplify one another.

In other words, if you fall within the 24% of the population who has a hard time processing these toxins (likely due to your genetics) you’re in for a real treat.

Dealing with a mold problem can be quite a challenge, especially if it’s making you ill. The costs can be daunting and finding competent medical care is extremely difficult for many. The initial investigations are wrought with worry, and the work itself is akin to a home invasion. It doesn’t help that people often think you’re crazy if you point to mold as the source of your woes, and the whole process can make you crazy even if you aren’t already. It’s not uncommon for mold-sensitive people to set up tents in their yards while remediation is done, or to disrupt their normal routines in other ways while a solution is sought. And this is all happening while you’re probably too tired to take out the garbage.

The bottom line is, if you are suffering from Lyme disease, and are also concerned about a possible mold problem in your home, the former may not get any better until you remove the mold. Indeed, it may get worse. And if you have Lyme but don’t think you have a mold problem, it pays to make sure. Mold could be silently undermining your efforts at treating Lyme (while simultaneously causing illness in other ways). Testing is key and this is where GOT MOLD? and the GOT MOLD? Test Kit can help. Stop worrying. Start knowing.

Posted on Leave a comment

The Problem With Guaranteed Mold Prevention

reading the fine print on 100% Guaranteed Mold Prevention

I love it when I see mold remediation firms, and companies that sell the products they use, offering multi-year guarantees or warranties. It helps me to know –  immediately – who I will never refer clients to. See, mold growth can occur within 24-48 hours of a water event, or excessive dampness, according to the EPA. So, how does a company that removes black mold offer guaranteed mold prevention, especially since they have no way of knowing whether or not there may be another unattended flood or leak, or if your dehumidifier dies while you’re sunning yourself in the Caribbean? They can’t, except with some fancy fine print. Caveat emptor.

See, if the conditions are right for mold—which simply means dampness for an extended period—no amount of mold-killer or anti-microbial, or anything will prevent it. I’ve seen mold growing on dust on glass. I’ve seen mold growing on every surface you can imagine.

There’s a company called Anabec, which makes a whole slew of products commonly used in mold remediation. They, and the contractors who use their stuff, offer warranties on their mold prevention and remediation products ranging from 10 to 50 years! Must be powerful, eh? Well, actually, here is their fine print, which I copied from their website.

Property Owner Obligations
 
The Anabec products are not an alternative to good housekeeping and maintenance practices and it is the property owner’s obligation to insure [sic] there are no pipe leaks, high humidity levels, moisture intrusion, etc.
 
The owner’s obligations are:
  • The Owner will maintain treated surfaces in accordance with general good housekeeping and insure [sic] treated areas are kept dry.
  •  The Owner is responsible for making immediate repairs when necessary to stop water intrusion in treated areas, interior areas, and roof or exterior walls to stop any moisture intrusion. Failure to recognize and repair such conditions will render the warranty void. 
  • The Owner shall at all times maintain environmental control of the indoor air by ensuring a consistent relative humidity of 65% or below and sufficient ventilation in all indoor spaces. Shutting down the HVAC system for an extended period of time has adverse effects on the indoor building materials and will render the warranty void.
  • Any claims of the terms of this warranty must be made immediately with verbal communication and in writing directly to Anabec, Inc. and the Anabec Qualified Contractor within 7 days of discovery of any mold re-growth on the surface.

This is truly amazing to me. If you follow their guidelines, they should offer a lifetime warranty! Why limit it to 10 or 50 years? If you keep surfaces clean and dry, mold will NEVER grow! End of story!  So what they’re saying is that if YOU do YOUR job, they will graciously guarantee that their products will work, but only if YOU do YOUR part, which is to make sure that the conditions for mold growth don’t exist. Which means you don’t need their products.

Posted on Leave a comment

Renter’s Playbook: What Are My Rights as a Renter With Mold?

rental agreement and mold

No matter whether you rent or own, your home should be where you feel safest. It should be where you rest and rejuvenate. It’s a place where you take care of yourself and those you love.

When you own your home and think you have a mold problem, in most cases, it’s simply a matter of figuring out the why’s and how’s, and then getting it taken care of, assuming it’s within the budget.

When you rent, though, it’s a whole different ball of wax. Your landlord will likely need to be involved, and that’s where things can start to get messy. The first decision is whether or not to do testing, and if so, who’s paying for it. In my decades as the owner of a leading mold inspection company, renters would call us all the time to get prices, hoping their landlord would spring for the inspection, only to be disappointed to find out that the landlord would rather just send in the maintenance crew to either rip it out or paint over it. Neither is an acceptable first step for a potentially significant mold issue nor do they get to the heart of the matter, which is locating the source of the moisture. Mold, after all, is a moisture problem.

Alternatively, your landlord may bring in their own mold “expert” to take a look, rarely taking samples or performing a comprehensive inspection. Often, the purpose of these so-called experts is to simply help the landlord figure out why this is all your fault or to find a cheap solution, which is probably not a solution at all. In these instances, the ideal path to resolution, where proper remediation is planned and executed, is rarely the landlord’s goal.

So, when you’re in this situation, what can you do? Call the Department of Health? Unfortunately, the DOH isn’t usually helpful in the beginning stages. Occasionally your Local Housing Authority will go to bat for you, but it depends on where you’re located. Should you get a professional inspection done, which may cost more than a month’s rent? It depends. In some cases it makes sense, assuming you can swing it, especially if you have an apathetic landlord or the mold problem is severe and putting your health at risk.

The most important first step is knowing your rights as a renter. The laws are different from state to state, so do your own research or consult an attorney, but in most jurisdictions, there’s a legal doctrine known as the Implied Warranty of Habitability (“IWOH”). In essence, what this means, is that your landlord has an obligation to provide housing that is fit and habitable. What’s interesting is that you’ll see no language in the lease about this, hence the reason it’s called the implied warranty of habitability. It’s a given and it need not be explicitly said in the rental agreement. People renting out housing have certain fundamental obligations.

How do you define fit and habitable? The unit/building has to be substantially compliant with state and local building and health codes. Above all, the rental unit must not have conditions that would be a threat to the health and safety of the tenants. It’s pretty simple.

Issues that may cause you to invoke the warranty of habitability may be as simple as appliances that aren’t functional, or as severe as gaping holes in your roof or broken windows, exposing you to the elements. Significant leaks and mold are potentially just as serious. Since most people reading this are worried about mold, let’s focus on that.

It has been said that common sense is not so common, so I will say this even though it’s as basic as you get. When you’re dealing with a mold problem, you’re actually dealing with two issues; the moisture source, and the mold. One causes the other, and if you don’t correct the underlying water problem, the mold will most assuredly return. This is why so many landlords get into trouble with mold. They spray some bleach or slap on a coat of paint, only to see it return again. It can be very frustrating to deal with this approach as a tenant, especially if someone in the house is having his or her health affected by the mold. So what do you do?

  1. Document, document, document: Get a notebook and keep detailed notes on every interaction with your landlord and building staff regarding your apartment and the issue(s) at hand. Every conversation, every time maintenance attempts or performs a repair. Dates, times, names, etc. This is very important, especially if this drags on for a long time. If you ever have to go to court, that notebook will be your best friend.
  2. Protect yourself: If where you live is a threat to your health, you need to pull out all the stops. First, talk to your doctor. Explain what’s going on. They may tell you to move, which you may have to consider. If not, it often helps to have them write a letter that clearly states that you, or the person you’re caring for, has a medical condition that is exacerbated by mold exposure. People with more serious health problems, like a compromised immune system, cannot live in a moldy environment under any circumstances. A strongly written letter from your physician gives you a lot of leverage, especially if you have to go to court at some point. If you choose to stay and see it through, get yourself a good air purifier or two to reduce exposure. You don’t have to spend a fortune. Here are some units we like a lot. Also, if you can, consider relocating temporarily, although I know that’s not often practical or possible.
  3. Notify the landlord in writing: In addition to the contemporaneous notes, when you have a repair or maintenance issue, and your landlord has proven to be unresponsive or dismissive after a verbal request, you must put your request in writing. There’s no hard and fast rule about how many times or how often you should request something be taken care of before you escalate things, but I feel that three letters are enough. The first one is friendly. The second one reminds them of the first one and reiterates your request and concern. If someone seems to be getting sick from the mold, you must say so. The third one lets them know what you’ll be doing next.
  4. Seek legal counsel: Find a local attorney with landlord-tenant dispute experience. There are non-profit law firms in some areas that specialize in things like this. Sometimes they can point you toward free government resources, which can make all the difference in the world.
  5. Consider getting an inspection & testing done: It’s often a good idea to get a proper inspection done, with testing, to make sure you’re not off-base, and also to make it clear to your landlord that you’re serious about the situation. You can easily get into arguments about how bad it is or isn’t, but until you have real data and a report from a qualified professional, it’s simply a matter of opinion. Also, the byproduct of a proper inspection is a remediation plan which tells the building owner exactly how it needs to be done, according to the industry standard and/or any regulations which may exist in your area. This will usually wake them up to the reality that they shouldn’t attempt to do the work themselves. It can save a lot of back-and-forth and wasted effort on everyone’s part, not to mention preventing things from getting worse due to a botched mold cleanup. Don’t ever expect, or even ask, for your landlord to pay for an inspection up front, because one of two things will happen. First, they’ll say no. Second, they’ll hire someone who will tell them what they want to hear and beat you to the punch. Don’t waste your time. Your best bet is to try to get a reimbursement after the fact. The old adage that it’s better to ask for forgiveness than permission applies here.
  6. Withhold rent: Landlords want to get paid. The good news about the IWOH is that it’s a two-way street. They maintain a fit and habitable place for you to live, and you pay rent. If they fail to keep up their end of the bargain, you don’t pay. At least not right away. This is where things get complicated because every jurisdiction has different laws about this. Some allow you to withhold rent and then argue at an eviction hearing about all of the things they didn’t do, which sounds like a nightmare to me, and a risky proposition. Other towns and cities allow for you to pay the rent to the Clerk of the Court or into an escrow account, releasing funds to the landlord only when the unit is deemed fit and habitable. Here’s a link to a piece about this rather murky subject. Do your research. This is often the most powerful tool in your toolbox if you do it correctly. If you play by the rules, you’ll be amazed how quickly they usually rally.
  7. Evict yourself: If you’re fed up, or just looking to get out of the lease, and move on, once you’ve withheld rent and they’re not cooperating, there’s something called constructive eviction, where you essentially terminate the lease without penalties or being subject to the rest of your obligations under the lease agreement, based upon the landlord’s failure to comply with the IWOH, among other things.

The reality is that most landlords are just starting to realize how serious mold can be, and the liability that comes along with deferred maintenance. You’ve probably heard that cheap people pay twice, and landlords often fall into that camp. Don’t be surprised if it’s an uphill battle, but if you handle everything right, you will usually prevail. The most important thing to remember is that it’s your home, even if you don’t own it, and there are things you can and must do to protect yourself and your family. There are resources available to you that give you more power than you can imagine. Get out there and use them to their fullest.

DISCLAIMER: I am not a lawyer. I’ve never even played one on TV. This is not legal advice, and should not be construed as such. I’m just sharing my experience here. When in doubt, consult an attorney.

Posted on 6 Comments

How to Prevent Mold in Your Finished Basement

mold in unfinished basement

Don’t finish a basement…until you read this.

Due to popular demand, I have been impelled to sit down at my computer and put to paper my mold prevention ideas and concepts that apply to finishing basements and other sub-grade living spaces.

First, please know that some of the ideas and suggestions laid out below may not conform to all building codes throughout the country. Before proceeding with any work, always check your specific municipality for rules and regulations.

Second, let me say that if you are reading this you are head and shoulders above others who will haphazardly sheetrock and carpet a basement without concern for the inherent problems that traditionally accompany finished basements.

Few of these ideas are original. The true value of this piece is to shine the light on the choices you have as you endeavor to add very valuable space to your home.

If done right, a nice profit and many enjoyable years can grow out of your healthy, well-designed basement. If done wrong, or without proper attention to the crucial details, other things will grow out of—and in—your basement.

Mold 101

Let’s start with a brief course in mold. Here’s all you need to know for now.

Mold spores are like microscopic seeds that are constantly floating around in the air. In fact, unless you are highly sensitive or there is a large concentration of spores as a result of a mold growth problem near where you are now sitting, the air you are now breathing contains mold spores that are probably not bothering you in the least. Mold spores are literally everywhere; on your clothing, your eyeglasses, the face of your watch, your kitchen table. This is unavoidable. What we really want to avoid is mold growth, not mold spores, since mold spores are, in fact, unavoidable.

Why do you not want mold growth in your house? In a nutshell, here it is:

  • It stinks
  • It ruins your stuff
  • It can make you and your family sick
  • Other nasty stuff likes to join the party (i.e. dust mites, spiders, bacteria, amoeba, nematodes)
  • You may end up having a hard time selling your house

Mold growth occurs when a few specific factors are present. In fact, part of the problem is that these factors are very often present indoors because mold loves the same conditions we do, with few exceptions.

  • Moisture/water
  • Oxygen
  • Comfortable temperature
  • Nutrition/food source (cellulose, i.e., drywall, ceiling tiles, wood, carpet, etc.)

Of all of the above factors, moisture is the most easily controlled. In fact, few of the other factors are easily or cost-effectively dealt with. So, control moisture you must. Moisture control is the mold-prevention mantra.

Also at play is the type of building materials and the way they interact and integrate in modern construction. The way we have built and continue to build homes since the 1970s energy crisis, and what we build them with, makes it very easy for mold growth to occur indoors. Most builders use low-cost materials, over-insulate and insist on putting basements into buildings built in areas with poor soil drainage or high water tables. One of my mentors is fond of saying that we now build self-composting houses – just add water!

When it comes to finishing basements, you have more choices and – at the same time – more problems. Since it is a much smaller space than the rest of the structure, you can spend more money on specialized building materials that resist moisture and mold growth. At the same time, the added cost can sometimes make it more expensive than it’s worth for some homeowners. For example: Dens-Armor Plus by Georgia-Pacific, a fiberglass-faced gypsum board with no mold-friendly nutrition source for the mold to grow on, is at least 2x the cost of a normal 1/2” paper-faced drywall gypsum board. In fact, many of the solutions are twice the price but worth every penny. The way I figure it, you can spend twice as much once and do it right, or you can do it wrong and spend half as much, but end up doing it twice. The first choice is much easier, and you won’t have to spend a small fortune on a mold remediation specialist to gut your basement and then a remodeler to rebuild it all over again. Oh, the savings!

In addition to donations, I accept Thank You cards. This means you can thank me for saving you tons of money in advance. Tons. I really like the Thank You cards. (I still prefer donations though.)

Moving on.

Ideas & Guidelines

Here are the primary ideas and guidelines to follow:

  1. Stop the water: If you have a damp basement or get water sometimes, you MUST do whatever is necessary to fix it before doing anything else. A dehumidifier is NOT the silver bullet. If you can, you should do whatever you have to do to prevent the water from coming into the basement in the first place. This can sometimes mean excavating outside, fixing cracks and sealing the foundation properly (Big $$$$). Although still expensive, some people install French drains (see more on them later) and sump pumps with battery backup units. This can be helpful but, again, it is not a silver bullet all by itself. You may find that something as simple as re-grading outside, covering window wells or extending the gutter downspouts further from the foundation is enough. You may find that some combination of these may work. In any case, do what you must. Otherwise your allergies and your wallet will suffer.
  2. Monitor the humidity with a digital humidity gauge otherwise known as a hygrometer (available at Radio Shack, Lowe’s, etc. for about $20). Keep your humidity at 45% or below. In fact, you should do this in the other areas of your home as well. Maintaining a moderate humidity in your home is one of the most important things you can do to keep your home healthy and help prevent mold growth, dust mite proliferation, and a whole roster of other nasty stuff. In the basement, do not even think about finishing it until you get a handle on the humidity.
  3. Insulate all cold water pipes to prevent condensation. When possible, insulated ducts are a great idea too to prevent condensation from accumulating on the ducts in the ceiling when the air conditioning is running. But this is not always practical.
  4. DO NOT PAINT YOUR BRICK OR CONCRETE WALLS, even with Drylok or waterproof paint. Concrete does not support fungal (mold) growth, paint does. Even most antimicrobial and antifungal paints and coatings will eventually grow mold if the conditions are right. Also, do not attach insulation directly to the foundation walls. It behaves as a moisture trap and can also hide structural problems and cracks in the foundation. Bottom line: basement walls need to breathe too.
  5. How ‘bout a little elbow room?: Although this is sometimes impractical and you can lose a lot of square footage, building the wall at least 18 inches away from the foundation gives you permanent access to your foundation and allows enough air movement that ventilation and dehumidification can work together to the fullest. Also, if you ever need to perform any repairs to the foundation, it can be done with little additional cost and destruction. It also makes upgrading wiring, plumbing, sound systems etc. much easier and less expensive.
  6. Use metal studs or, if you use wooden studs, make sure to put in a pressure-treated sill plate. As a rule, untreated wood and any porous or absorptive building materials should never be in direct contact with concrete. A concrete slab and foundation can contain thousands of pounds of water and will gladly transfer that moisture into anything porous and absorptive it touches. Once the moisture gets in and stays, mold growth, and eventually rot, are inevitable. So keep wood, drywall, carpet, carpet padding, tack strips, etc. away from direct contact with concrete.
  7. Insulate properly: Although some building code officials do not like rigid insulation, it is a preferred material for moisture-prone areas such as basement. Unlike traditional fiberglass batt insulation that you will find in most attics and wall cavities, rigid insulation will not absorb water. Also, rigid insulation contains no nutrition to support mold growth but the paper backing on many kinds of fiberglass batt insulation does. Building code officials don’t like rigid insulation sometimes because in the event of a fire, the gases are deadly. So if that scares you or your local building code official too much, then fiberglass batt insulation is your best bet. Johns Manville makes a Formaldehyde-Free fiberglass batt insulation that is great for families concerned about indoor air quality. You’ll know you’ve found it because it is white, fluffy and encased in plastic.
  8. Heat and air condition the basement just like the upstairs. Consult with a NATE-certified HVAC technician to prevent losing heating and cooling efficiency upstairs.
  9. No carpet. No hardwood floors. Ceramic tile is the preferred choice. Pergo is often recommended but I have my reservations. Pergo, as with all laminate flooring, is made by taking fiberboard planks and wrapping decorative laminate sheeting around them. The fiberboard inside is a favorite on the menu mold likes to eat from most. If you insist on carpet don’t overspend, seal the slab with an epoxy-based concrete floor sealer, use no carpet padding, and install Dri-Core (www.dricore.com) or Barricade (www.barricadesubfloor.com) raised-floor systems on the slab. Then put your carpet over the raised floor system. If you flood, for whatever reason, the carpet will need to be professionally dried within 24 hours, or it is garbage. Period.
  10. No drywall on exterior walls. This includes “green-board”, “blue-board” or any paper-faced gypsum wallboard. All of it will get moldy in a wet environment. On exterior walls, DensArmor Plus by Georgia-Pacific is the only way to go. It has no mold-friendly nutrients and is just as easy to work with as standard drywall. At this writing, the only problem with DensArmor Plus is that it has a slightly different surface texture when compared to traditional drywall. It requires more primer and more paint to even out the surface. When I called Georgia-Pacific to ask them about this they assured me that they are working hard to remedy this.
  11. Get it up: Regardless of the type of wallboard you use, keep at least a 2-inch gap between the bottom edge of the wallboard and the slab to prevent wicking in the event of water intrusion or release. Use molding along the bottom to cover the gap for aesthetic reasons. Do not let the drywall touch the foundation walls either.
  12. Get exhausted: If bathrooms or a kitchen are part of the plan, exhaust fans vented to the outside are a must.
  13. Stuff it: Anything stored in the unfinished areas should be in Rubbermaid containers or, at least, up on shelves.

About French Drains*

* Regulations regarding French Drains may differ by state or locality.

    • Perforated pipes and gravel under the floor around the perimeter that are pitched toward the sump pump pit.
    • The pipes terminate, or drain, into a pit, or sump.
    • The pit has a pump capable of ejecting the water out and away from the building.If you think you have a French drain, you might. But you probably don’t. Most people were told when they bought their house that the gap between the wall and the floor around the perimeter of the basement is a French drain. A vast majority of homes that have this gap where the floor meets the wall actually have something called a “floating slab.” It was designed that way for a few reasons. a) The gap allows for a very small amount of water to collect in the gap and not get onto the floor. It should eventually drain, but VERY slowly. The problem is there is no pitch or slant for the water to follow and so the water just sits there and then, most of the time, evaporates creating high humidity or allowing the random debris in the gap to get moldy and decompose; neither is a good outcome. b) It allows the floor to “float” slightly and prevents the cracking that may result from excessive vertical pressure from rising water under the floor. c) Every state has different laws regarding warranties for new homes. Homes in NJ come with a 10-year structural warranty and a 1-year water guarantee. This perimeter gap conveniently keeps the water off the floor long enough for the warranty to expire and the builder to get off the hook. A French drain can be used inside or outside. These were described and popularised by Henry French, a lawyer and Assistant US Treasury Secretary from Concord, Massachusetts in his book Farm Drainage. (Thanks to Tim Hurst for this correction.) A true interior basement French drain contains a few elements. There are many bells and whistles but the guts of it remain the same.
  1. If you want to know whether you have a true French drain or not, this requires some investigation. Here are a few questions to get answered:
    • Can you see gravel or stones in the gap?
    • Do you have a sump pump pit with a working pump and pipes that drain into the pit?
    • If you pour water into the gap, does it disappear quickly no matter how much you pour in (think: garden hose full-blast for 10 minutes)?
    • Does it make it into the sump?
    • Can you see a “scar” around the perimeter where it looks like concrete was removed and replaced?
    • If you have a concrete or cinder block foundation, are there holes drilled into the block walls all the way around the perimeter that allow for the cells/voids within the walls to drain into the gap?

    If you answered “no” to more than a few of those questions you probably have a floating slab. If you want confirmation, open your phone book to Waterproofing and call a few of them to come and take a look. Be prepared to endure a sales pitch and sift through the BS. But you should be able to find out what kind of drainage you have…or need.

  2. If you have a sump pump, a battery backup unit is a must. Just think, when do you lose power? During a thunderstorm or hurricane, right? When do you need a sump pump most? Exactly.
  3. Make sure that the discharge from the pump goes far enough away from the house.
  4. If you get an interior French Drain installed or are willing to add to your existing one, a round floor drain tied into it is a great idea, especially in the middle of the floor, the bathroom, or anywhere else that floods and spills are probable and likely.
  5. This one will make my friends in the waterproofing business hate me, but you will love me for speaking the truth. Most installers are crooks. Check the Better Business Bureau and call at least three references. Get an insurance binder—not an insurance certificate—with your name and address on it BEFORE the work is started. Do not give more than a 10% deposit and make sure it is refundable in the event they fail to deliver the insurance binder. Get everything in writing and go with your gut. If something feels wrong, you’re probably right.
  6. It is often a high-pressure sales pitch so put on your thick skin and don’t fall for the scare tactics. Most of the systems are so similar in design that the main variable is the quality of the company. Since what you are really buying is a warranty, make sure they will be there when the system leaks or the sump pump fails. Both will probably happen at some point.

Oh, and good luck. Remember my first piece of advice… don’t finish your basement.

But if you insist, at least do it right.

Posted on Leave a comment

What Causes Attic Mold?

mold in attic

As the holidays approach and the decorations start coming out of the attic, you may be surprised to discover you’ve got a mold problem.

In the attic? How’d that happen?

An attic is the least actively used space in most homes. Not only is it out of sight and therefore out of mind, but it’s usually pretty inhospitable—scorching hot in the summer and brutally cold in the winter. These extremes, in fact, are a big reason why some attics get moldy.

Here’s the thing: For a mold problem to develop, you have to have excess moisture. No water = no mold. That means mold will not grow in a dry, well-ventilated attic. So what causes moisture to accumulate in an attic? A ventilation problem. It’s really that simple. What’s not so simple? Keeping your attic dry and properly ventilated.

Moisture

People indoors generate significant humidity simply through the mechanisms of daily. Respiration (breathing), transpiration (sweating), cooking, bathing, cleaning, and numerous other activities all pump water into the air. Even having lots of houseplants can add a significant amount of humidity. Damp basements and crawlspaces are big offenders. As are un- or misused dryer vents and improperly installed bathroom exhaust fans.

Here’s where I throw you a curve ball. Most people think it has to be warm and wet for mold to grow, and while that’s partially true, certain molds are able to grow in very low temperatures, though they still require moisture. Ever seen black mold growing on the gasket around a refrigerator?  This is usually a common mold called Cladosporium. It doesn’t mind the cold so much. It also has a tendency to grow in attics where there’s a moisture trap. But here’s the key: most mold problems in attics are a wintertime phenomenon, not a summertime one. Counterintuitive but true.

As we all remember from eighth-grade science class, warm air rises in a building. In a case where there’s a lot of moisture in that warm air, and it eventually finds its way into a cold attic, the water in the air will bead up on the cold interior surfaces of the roof, as it would on a glass of iced tea on a hot summer day. During really cold periods, this condensation will actually freeze, making some attics an unintended winter wonderland.

In such circumstances, the exposed nails will transform into icicles overnight, and when the sun comes up, the roof warms and melts the icicles, causing them to drip rusty water droplets onto the floor. This cycle of moisture accumulation on the dusty wooden surfaces of the attic is enough to create an environment conducive to mold growth.  Sometimes this takes decades, sometimes only one season. Depending on the severity of the problem, the damage can range from some minor surface mold, which can be easily cleaned, to complete rot and degradation of the sheathing, requiring a new roof. Not fun and certainly not cheap.

Icy attic pic

Moldy roof repair


Ventilation

Contrary to what you may think, an attic fan is far from sufficient for effective ventilation. That’s because they are designed to operate during the summer to remove excess heat. Also, the vents on opposite ends of many attics, called gable vents, do nothing. They are worthless for the purpose of moisture control. I’ve seen homeowners try every sort of shortcut possible to avoid doing what really needs to be done, but the fact is, there’s only one flawless solution: natural ventilation with ridge and soffit vents.

So, what is natural ventilation?

When warm, moist air rises, a well-ventilated attic will allow it to escape through the peak of the roof, via something called a ridge vent. In order to make up for the air escaping through the peak, supplemental air needs to come from outside, but in a very specific way, from a very specific place: the eaves through soffit vents. When this happens — when warm, moist air escapes through the attic peak, rather than being trapped, and the vents in the eaves allow air to come in from outside — the surface temperature of the inside of the roof stays closer to that of the outside of the roof. This prevents condensation in the wintertime and also helps keep the roof cooler in the summer, extending the life of asphalt shingles.

No fans. Nothing to remember to do. It occurs naturally and flawlessly, but here’s the key: The ridge and soffit vents have to be continuous and integrated. In other words, they have to go from one end of the roof to the other end, and they won’t work without each other. Some building codes require new roofs to have ridge vents, but those are essentially useless without soffit vents.

There is a specific amount of ventilation needed for every attic. Owens Corning has an interesting online tool to perform the calculation.  Very helpful if you plan on making any changes.

Another crucial element of proper attic ventilation is making sure the vents in the soffits are not blocked by insulation. (See figures 1 & 2.) Many a weekend warrior will install new insulation in the attic to bring down the utility bill, stuffing every bit of insulation possible into the far corners of the attic, including the eaves, and inadvertently blocking the vents. This will render a functional natural ventilation system worthless. Hundreds of dollars in annual savings can eventually become thousands of dollars in mold remediation.

moldy attic illustration
Fig 1.
moldy attic illustration
Fig 2.

Another common mistake is venting bathroom exhaust fans into the attic instead of through the roof to the outside. When doing bathroom renovations, don’t make this mistake. It’s a costly one. Similarly, the absence of an exhaust fan in a bathroom used for bathing sends a ton of water into an attic. Get a fan installed and use it every time you shower or take a bath. Some people connect the bathroom light switch to the exhaust fan so that they know their kids will use it without thinking about it. Works like a charm.

What To Do

If you believe you have a mold issue in your attic, the first thing you should do is engage a professional who specializes in diagnosing mold and moisture problems. They will track down the moisture source, or sources, assess the extent of the damage, and determine where the ventilation failed and what needs to be done to correct it.

In all cases where a visible mold problem exceeds 10 square feet, the US EPA recommends you use a professional to clean it up.

(A word of caution here: You should never hire a company that performs both diagnostics/testing and remediation. This is a blatant conflict of interest since they will often be testing and inspecting their own work. In fact, some states have even made it illegal to do both.)

If the attic sheathing has not been damaged to the point where it is delaminating and losing its structural integrity, you can usually get away with surface cleaning. In this case, a qualified professional mold remediation firm would isolate the attic from the rest of the house (as described in the IICRC S520 Mold Remediation Standard), bag and remove all insulation, and then clean all exposed surfaces with HEPA vacuums and damp wipes.

attic wood picture

attic wood


Afterward, before the payment is made, the contractor should submit themself to a third-party clearance inspection where samples are collected for analysis to ensure that the job is complete. Also, the inspector should look to see that the appropriate repairs have been made, including the installation of requisite ventilation. After the inspector gives the green light, the insulation can be replaced. Do yourself a favor and get the formaldehyde-free insulation. And make sure not to block the vents in the eaves!

If, on the other hand, the attic sheathing has deteriorated and the plywood has started to delaminate, you will need to replace the roof. I know this is bad news, but it’s the truth. Once that’s done, then you can proceed with the process described above. Or you can initiate the cleaning of rafters and removal of insulation with the roof off, which makes a lot of sense, but it’ll require coordination between the roofing contractor, the mold remediation firm, and Mother Nature. Not always an easy feat. Regardless, make sure the roofer understands what continuous ridge and soffit ventilation are all about and that they install them that way. And make sure all of your exhaust fan vents are directed through the roof to the outdoors.

You may not care much about your attic now, but that’ll change quickly when an out-of-control mold issue starts hammering your wallet or becomes an obstacle to selling your home. Turning a blind eye won’t do you any favors. Proper ventilation will.